Newest Products


Sold as a pair, these adapters are for upgrading the speakers in the the front doors of 2007 to 2018 NCV3 Sprinter vans. The factory door panel and speaker grill is retained for a stealth factory look. This is a crucial step to enjoying better sound quality in your van.
The adapters were designed in 3D CAD and they are machined on a CNC router. The holes in the adapter are perfectly located and countersunk to mount over the factory posts and be secured with the original screws. Then you drill holes in the adapter ring for your speakers and secure them with sheet metal screws. We highly recommend installing 3M Thinsulate(TM) behind the door panel at the same time.
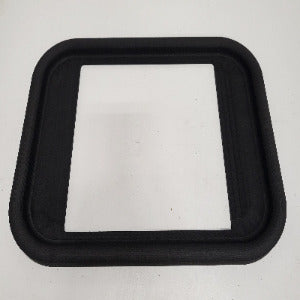
Material for the adapters is 3/4 thick expanded PVC. It won't absorb moisture like MDF or wood and holds screws well without splitting. O.D. is 6.5" (165mm). Thickness is 3/4" (19mm). There are many ID sizes to accommodate the cutout diameter needed for the speaker. Please continue reading to learn more about speaker sizing...
While shopping for speakers look for 6 1/2 or 6 3/4 speakers. COAX are the best bang for your buck and component speakers are potentially the best sound but involve replacing the dash tweeters and installing a crossover. Most 6 1/2" speakers require a 5" ID cut out diameter which is the size of hole the speaker will drop into. The corresponds to one of our spacers on the drop down list.
There are also what the industry calls 6 3/4" speakers which allows for a bigger cone and improved base response. These speakers require the 5.62 or 5.75 ID cutout diameter (hole). We have 5.62 and 5.75 ID adapters for these speakers. Do not choose speakers with thick cast aluminum or plastic frames with protruding terminals. These are too large to fit into the smaller hole in the door sheetmetal. It is best to choose a speaker with a thinner formed metal frames and terminals that can be bent slightly should they interfere. Also do not choose a speaker that has a thick frame above the mounting face. This will interfere with the door panel. Overall height of the spacer and speaker should not exceed 1". The door panel can be trimmed to clear a taller speaker. Please contact us if you need help choosing or verifying the fit of a particular speaker.
Here are some specific suggestions of speakers that should fit.
Rockford Fosgate Prime R1675x2, these would take the 5.75ID size,
JBL GT7-6, these would take the 5.625 ID size. If you choose the component version you may have to modify the adapters.
Sprinter door speaker wire color code:
Left Front Speaker Positive Wire (+): Brown/Violet
Left Front Speaker Negative Wire (-): Brown/Dark Green
Right Front Speaker Positive Wire (+): Brown/Orange
Right Front Speaker Negative Wire (-): Brown/Dark Blue
Custom sizes are available. Please send the cut out diameter or ID in inches or millimeters.
We are adding an option to include 3 linear feet of Thinsulate (tm) for the driver and passenger doors.


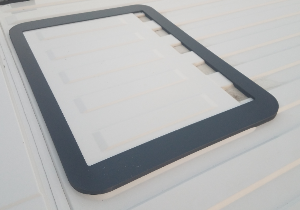
The framing strips are expanded PVC and bonded to the roof with a thick bead of Windoweld. They are more flexible than wood and plenty strong to support the vent and keep it from jiggling. We double them up when installing roof top air conditioners. They are essential if the span between the OEM roof beams is more than 18". They also provide a backing for the screws that hold up the vent interior bezel. They should be placed 1/4" away from the edge of the hole so the screws for the vent go into the strips. They are a generic size and will need to be cut to length. These strips are not contoured to the van corrugations.
Roof Vent Adapter Install procedure:
We recommend Sikaflex 221 adhesive. Locate and cut the 14 x 14 hole. You can use the adapter as a guide to mark the hole. Stay clear of roof supports, obviously. Make a tape line 1/4" beyond the adapter perimeter. De-gloss the area with a Scotch- brite pad. No need to scuff. Just dull the paint. Clean with isopropyl alcohol and let dry thoroughly. Blow dryer if it's wet and/or cold out. Apply three 1/8" beads of the Window-weld on the face of the adapter. Then press the adapter down onto the roof until the adhesive oozes out the sides. It's not necessary to clamp. If you do, use a lot of lightly set clamps and spread out the clamp force over the whole surface area. Using the adhesive that oozes out, make a fillet around the adapter with a double gloved finger. Pull the tape within 15 minutes. Cure is fast on outside. Let cure overnight and then proceed with the fan install. We recommend using butyl tape for the fan install. Cover the fan flange with 1 1/8" wide tape. Place onto of adapter and press down. Then drill pilot holes through the adapter and into the van roof. If the screws are going to go into a roof support beam then drill a clearance hole in the beam. You only want the screw to engage the adapter and outer skin. Use a step drill to keep from plunging through the skin. You may need longer screws. Tighten them very lightly against the fan flange. Some butyl will ooze out which you can trim off. Coat the fan flange adapter and onto the roof about 1/2" with brush on bed-liner or Flexseal from the TV guy works well. Some sealants will melt the fan plastic so you might try it on a portion of the interior bezel first. You'll cut a lot of that piece off. Good idea to check the integrity and reapply the sealant every so often. Dicor self leveling sealant also works but looks a little messy.
The option with butyl tape includes 64" of butyl tape
Van owner and/or installer assumes all risk associated with roof top mounted items and/or components. Van owner and/or installer recognizes and agrees that this product, and each of its component parts, is sold “as is” and that seller makes no representation or warranty of merchantability that the product is fit for any particular purpose.


BATTERY BOX MUST BE PAINTED IF NOT POWDER COATED. Wash the tray with soapy water, dry, then paint the tray before installing. Rustoleum truck bed coating spray or equivalent.
Batteries not included.
Copy and paste for installation help with the 2500 http://www.impact3d.com/170_2500_midship_tray.htm
Van owner and/or installer assumes all risk associated with roof top mounted items and/or components. Van owner and/or installer recognizes and agrees that this product, and each of its component parts, is sold "as is" and that seller makes no representation or warranty of merchantability that the product is fit for any particular purpose.
This kit includes: scissors, 4ft flexible rod and high strength string. Helpful products for installing your Thinsulate.
If you order with a roll of Thinsulate the package will be inside the roll.


Fits a 14" x 14" opening.
****The vent adapter outside dimension is 16 3/4 X 16 3/4. If you are using a Maxxair vent our adapter fits the deluxe series, other Maxxair vents have a wider flange. You will need a wider adapter. Please call.
The framing strips are expanded PVC and bonded to the roof with a thick bead of Sikaflex 221 or Windoweld. They are more flexible than wood and plenty strong to support the vent and keep it from jiggling. We double them up when installing roof top air conditioners. They are essential if the span between the OEM roof beams is more than 18". They also provide a backing for the screws that hold up the vent interior bezel. They should be placed 1/4" away from the edge of the hole so the screws for the vent go into the strips. They are a generic size and will need to be cut to length. These strips are not contoured to the van corrugations.
Roof Vent Adapter Install procedure:
We recommend 3m Window-weld adhesive which you can get at Napa. Locate and cut the 14 x 14 hole. You can use the adapter as a guide to mark the hole. Stay clear of roof supports, obviously. Make a tape line 1/4" beyond the adapter perimeter. De-gloss the area with a Scotch- brite pad. No need to scuff. Just dull the paint. Clean with isopropyl alcohol and let dry thoroughly. Blow dryer if it's wet and/or cold out. Apply three 1/8" beads of the Window-weld on the face of the adapter. Then press the adapter down onto the roof until the adhesive oozes out the sides. It's not necessary to clamp. If you do, use a lot of lightly set clamps and spread out the clamp force over the whole surface area. Using the adhesive that oozes out, make a fillet around the adapter with a double gloved finger. Pull the tape within 15 minutes. Cure is fast on outside. Let cure overnight and then proceed with the fan install. We recommend using butyl tape for the fan install. Cover the fan flange with 1 1/8" wide tape. Place onto of adapter and press down. Then drill pilot holes through the adapter and into the van roof. If the screws are going to go into a roof support beam then drill a clearance hole in the beam. You only want the screw to engage the adapter and outer skin. Use a step drill to keep from plunging through the skin. You may need longer screws. Tighten them very lightly against the fan flange. Some butyl will ooze out which you can trim off. Coat the fan flange adapter and onto the roof about 1/2" with brush on bed-liner or Flexseal from the TV guy works well. Some sealants will melt the fan plastic so you might try it on a portion of the interior bezel first. You'll cut a lot of that piece off. Good idea to check the integrity and reapply the sealant every so often. Dicor self leveling sealant also works but looks a little messy.
Van owner and/or installer assumes all risk associated with roof top mounted items and/or components. Van owner and/or installer recognizes and agrees that this product, and each of its component parts, is sold ?as is? and that seller makes no representation or warranty of merchantability that the product is fit for any particular purpose.


DISCLAIMER
Failure to follow warnings below may allow rack to come loose from vehicle and cause injury
or death.
1. Do not exceed total allowable load by vehicle manufacturer.
2. Use all available attachment points on van roof.
3. Do not install roof top deck or climb on rack.
4. Check and tighten all hardware after 100 miles and every 500 miles there-after.
5. Check overall integrity of rack every 500 miles or monthly whichever is more frequent.
If in doubt, please submit rack plans or photos for evaluation prior to final installation or use.
Van owner and/or installer assumes all risk associated with roof top mounted items and/or components. Van owner and/or installer recognizes and agrees that this product, and each of its component parts, is sold as is and that seller makes no representation or warranty of merchantability that the product is fit for any particular purpose.


The framing strips are expanded PVC and bonded to the interior roof with a thick bead of Sikaflex or Window weld. They are more flexible than wood and plenty strong to support the AC and keep it from jiggling. We double them up when installing roof top air conditioners. They are essential if the span between the OEM roof beams is more than 18".
Van owner and/or installer assumes all risk associated with roof top mounted items and/or components. Van owner and/or installer recognizes and agrees that this product, and each of its component parts, is sold "as is" and that seller makes no representation or warranty of merchantability that the product is fit for any particular purpose.


The framing strips are expanded PVC and bonded to the interior roof with a thick bead of Sikaflex 221 or Window weld. They are more flexible than wood and plenty strong to support the AC and keep it from jiggling. They are essential if the span between the OEM roof beams is more than 18".
If you order the framing strips they will come in a separate box.
AC Adapter Install procedure: We recommend Sikaflex 221 or 3m Window-weld adhesive. Locate and cut the hole. You can use the adapter as a guide to mark the hole. Stay clear of roof supports, obviously. Make a tape line 1/4" beyond the adapter perimeter. De-gloss the area with a Scotch- brite pad. No need to scuff. Just dull the paint. Clean with isopropyl alcohol and let dry thoroughly. Blow dryer if it's wet and/or cold out. Apply a good amount of the Window-weld on the face of the adapter. Then press the adapter down onto the roof until the adhesive oozes out the sides. It's not necessary to clamp. If you do, use a lot of lightly set clamps and spread out the clamp force over the whole surface area. Using the adhesive that oozes out, make a fillet around the adapter with a double gloved finger. Pull the tape within 15 minutes. Cure is fast on outside. Let cure overnight and then proceed with the AC install per the AC instruction. Seal the adapter and onto the roof about 1/2" with brush on bed-liner or Flexseal from the TV guy works well. Good idea to check the integrity and reapply the sealant every so often. Dicor self leveling sealant also works but looks a little messy.
DISCLAIMER: Van owner and/or installer assumes all risk associated with roof top mounted items and/or components. Van owner and/or installer recognizes and agrees that this product, and each of its component parts, is sold “as is” and that seller makes no representation or warranty of merchantability that the product is fit for any particular purpose.


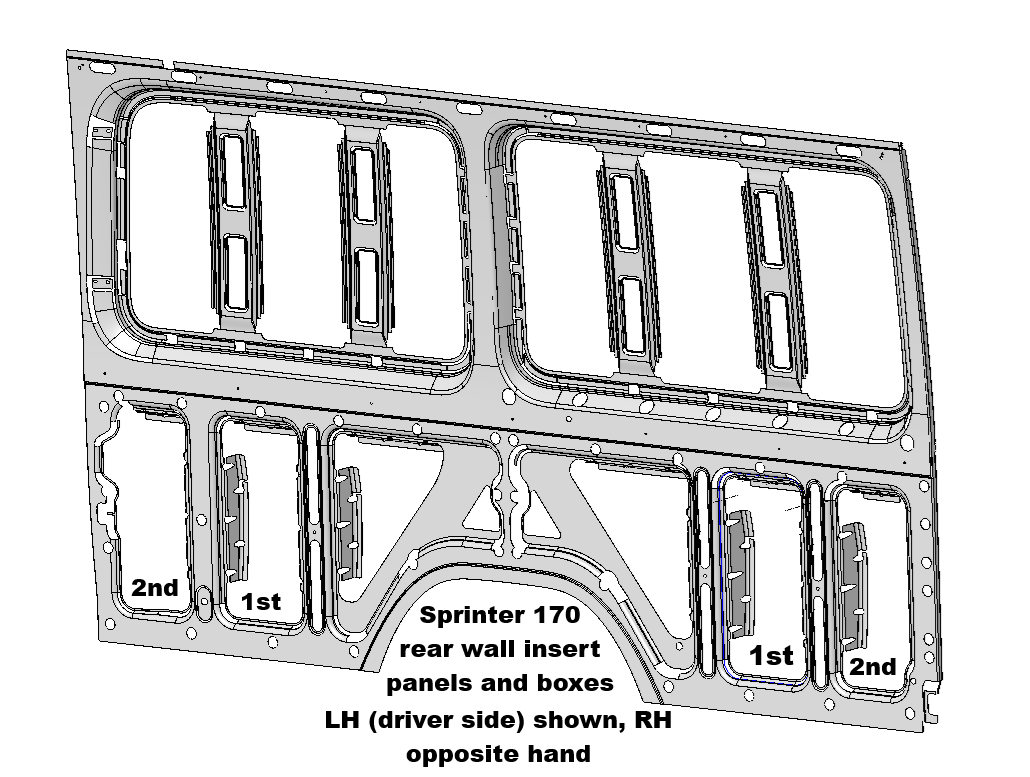
2) Please let us know what year and what wheel base you have: 144 WB, 170 Regular or 170 Extended.

AC Adapter Install procedure: We recommend Sikaflex 221 or 3m Window-weld adhesive. Locate and cut the hole. You can use the adapter as a guide to mark the hole. Stay clear of roof supports, obviously. Make a tape line 1/4" beyond the adapter perimeter. De-gloss the area with a Scotch- brite pad. No need to scuff. Just dull the paint. Clean with isopropyl alcohol and let dry thoroughly. Blow dryer if it's wet and/or cold out. Apply a good amount of the Window-weld on the face of the adapter. Then press the adapter down onto the roof until the adhesive oozes out the sides. It's not necessary to clamp. If you do, use a lot of lightly set clamps and spread out the clamp force over the whole surface area. Using the adhesive that oozes out, make a fillet around the adapter with a double gloved finger. Pull the tape within 15 minutes. Cure is fast on outside. Let cure overnight and then proceed with the AC install per the AC instruction. Seal the adapter and onto the roof about 1/2" with brush on bed-liner or Flexseal from the TV guy works well. Good idea to check the integrity and reapply the sealant every so often. Dicor self leveling sealant also works but looks a little messy.
Van owner and/or installer assumes all risk associated with roof top mounted items and/or components. Van owner and/or installer recognizes and agrees that this product, and each of its component parts, is sold ?as is? and that seller makes no representation or warranty of merchantability that the product is fit for any particular purpose.


Features And Benefits
- High wattage power inverter • True sine wave output
- 120Vac output
- High amperage battery charger
- Micro-processor controlled
- Regulatory Approved to cETus standards for North America, and CE standards for EU, UK, AU and NZ
- Multi-stage charging algorithm
- Charges a variety of battery types
- Lightweight compact design
- Built-in CAN BUS communication
- Accepts AC or DC input sources
- Built-in load sense to minimize battery drain
- Comes with remote panel included for unit setting and monitoring
Dimensions (L x W x H):
BIC122080 2000W: 15.4“ × 11.9” × 4.2” (391 x 302 x 106mm)
BIC1230100 3000W: 19.7” × 12.1“ × 4.2” (500 x 307 x 106mm)
Weight:
BIC122080 2000W: 17.6 lbs. / 8.0 Kg
BIC1230100 3000W: 22.9 lbs. / 10.4 Kg